
はじまり
あー、もう、どうなってんだぁ〜!?
どうしたどうした?
PythonでGoogleスプレッドシートを編集したいんだが、そのための認証が面倒でね・・・
どこで躓いたが分からなくなってしまったのだよ・・・!
じゃあ、今回はPythonでスプレッドシートを使うために、
Google Cloud Platformで行う初期設定を書いてみるかあ。
ヨロシク!
設定作業その1:Google Cloud PlatformでAPIを有効化する
まず、Google Cloud Platformでプロジェクトを作成します。(作成の過程は割愛します。)
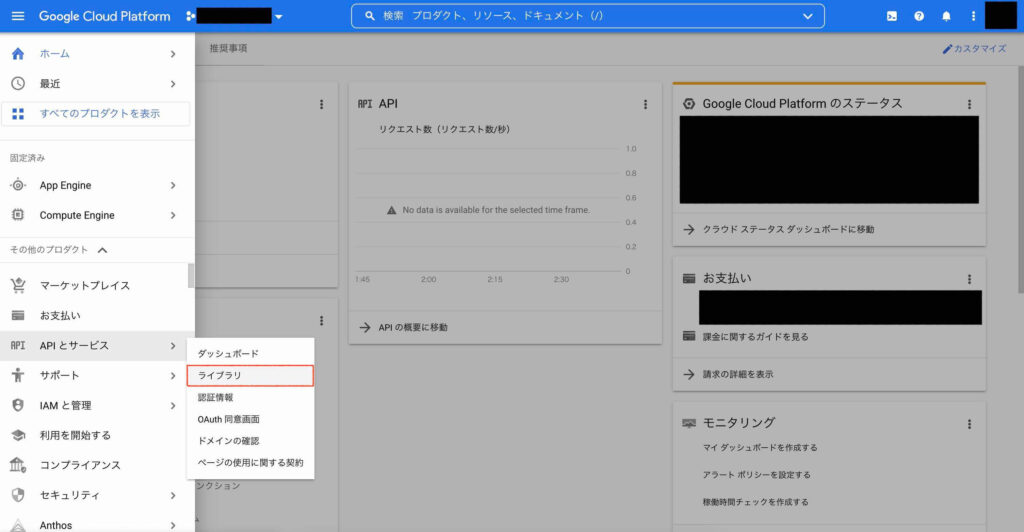
そして、GCPのコンソール画面のサイドバーから以下の「ライブラリ」をクリックします。
以下の画面から、今回必要なAPIを有効化します。今回は2種類のAPIを有効化します。
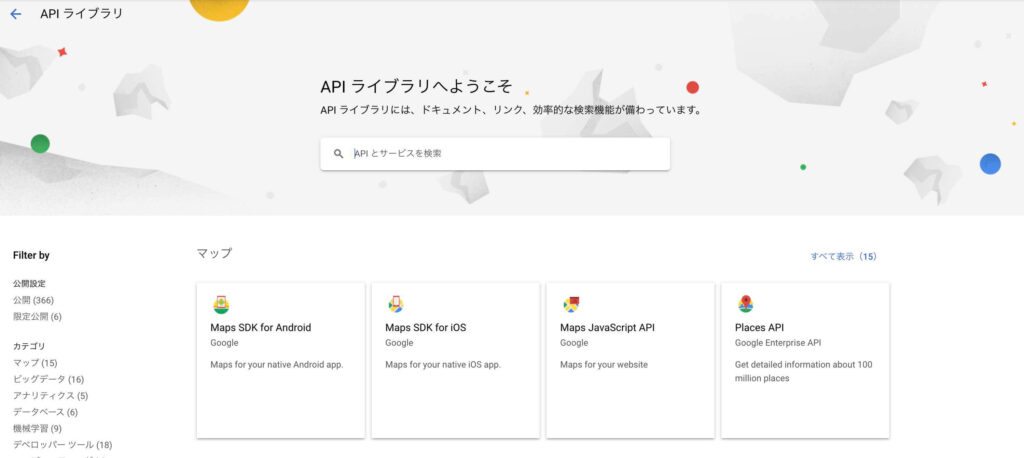
そして、「Google Drive API」と「Google Sheets API」を有効化します。
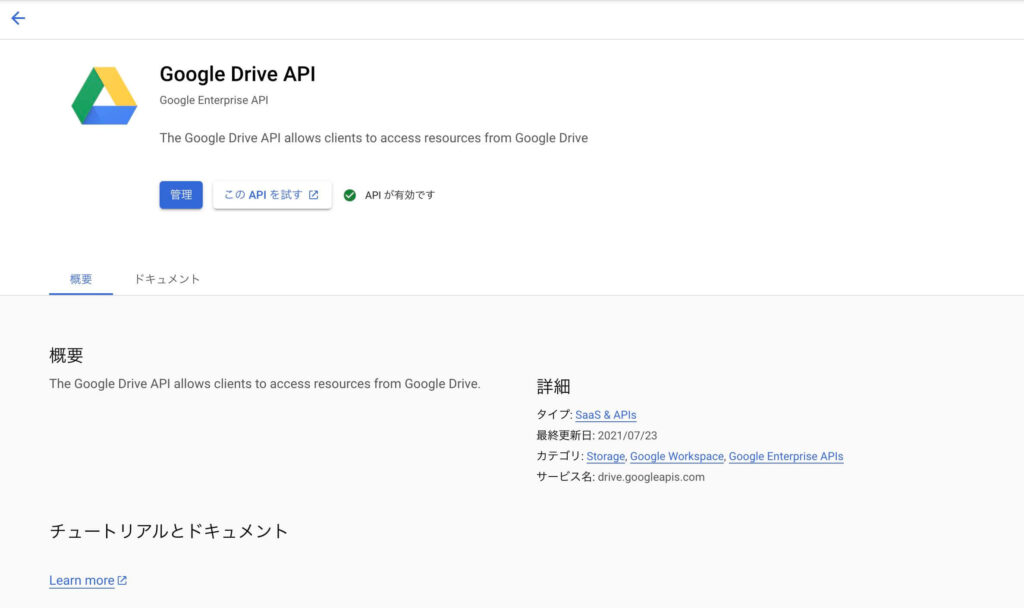
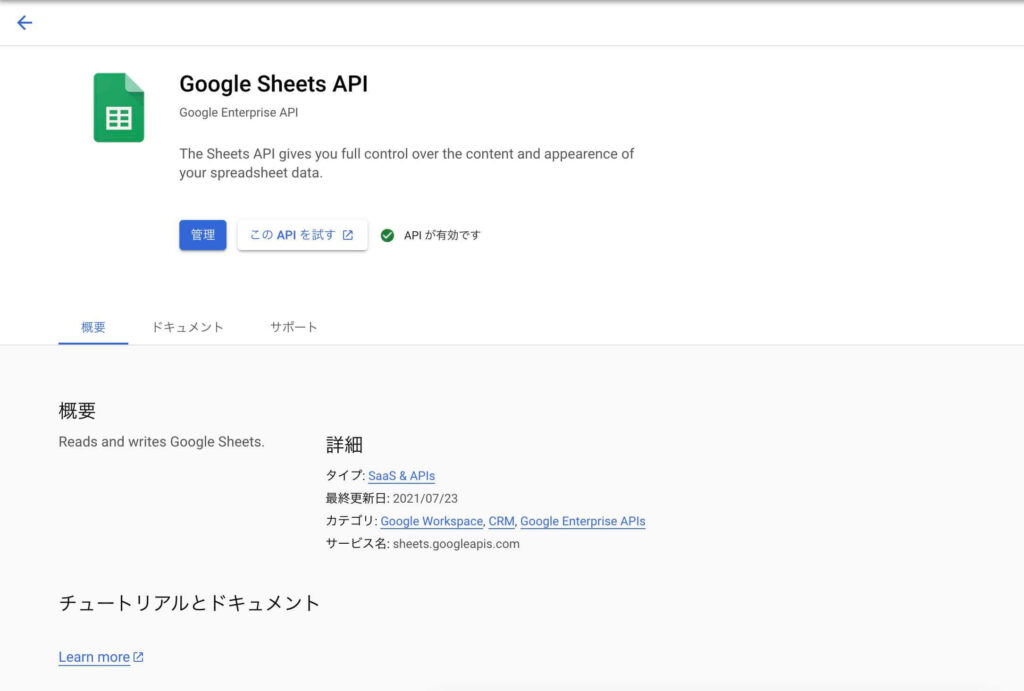
APIが追加できたかどうかを確認します。
今度は、「APIとサービス」の「ダッシュボード」をクリックして以下のような画面で確認します。

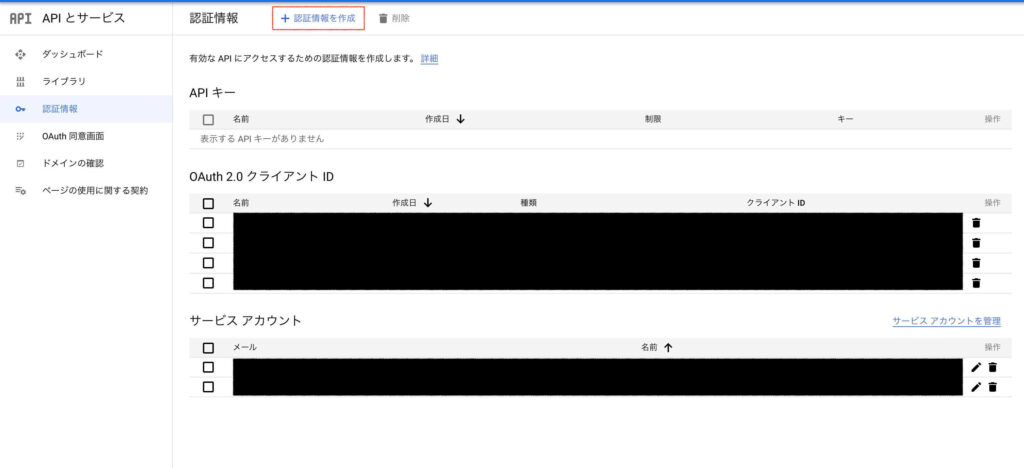
設定作業その2:Google Cloud Platformで認証情報を設定する
外部アプリケーションからスプレッドシートにリクエストするためにクレデンシャル情報を設定します。
「認証情報を作成」をクリックして、「サービスアカウント」を選びます。
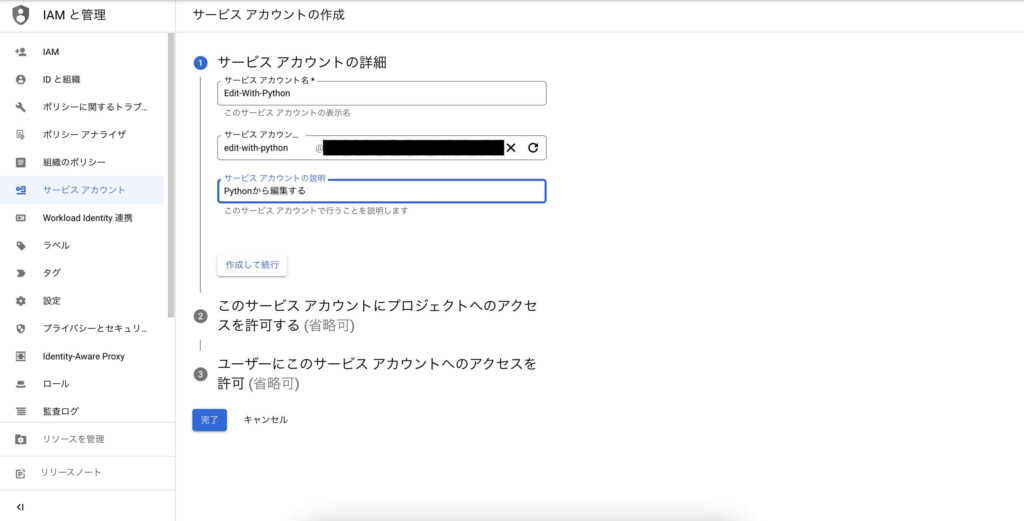
サービスアカウントの設定画面になります。
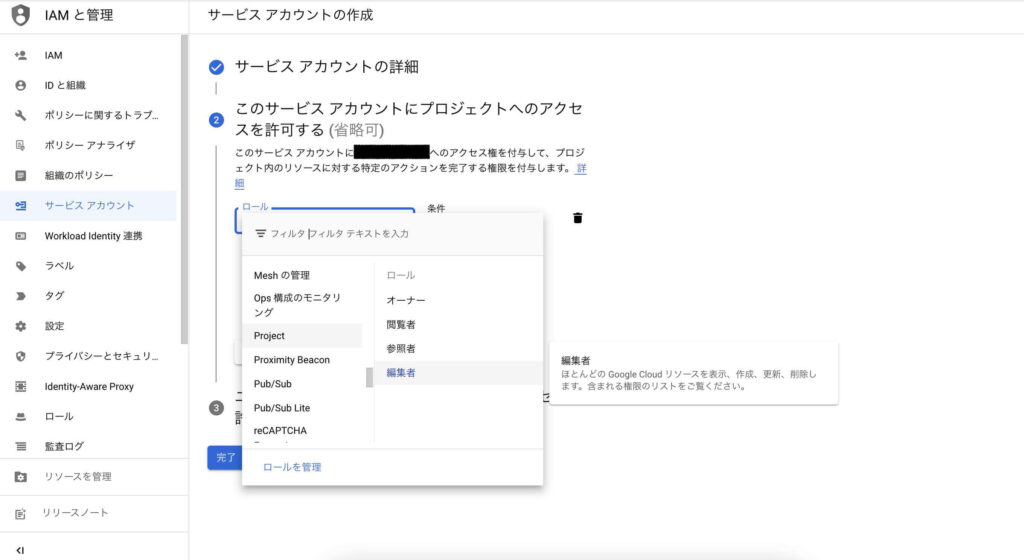
編集者を選択します。
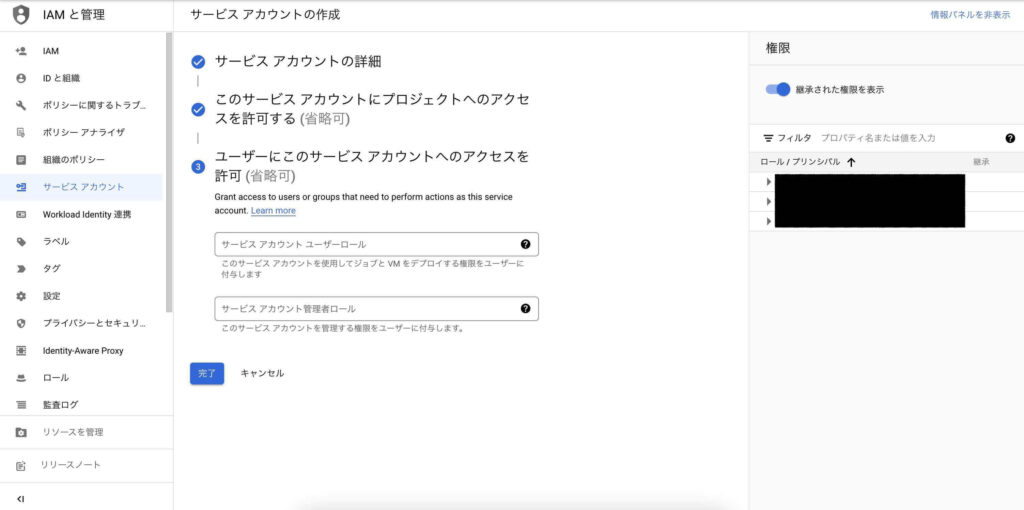
ここは省略します。
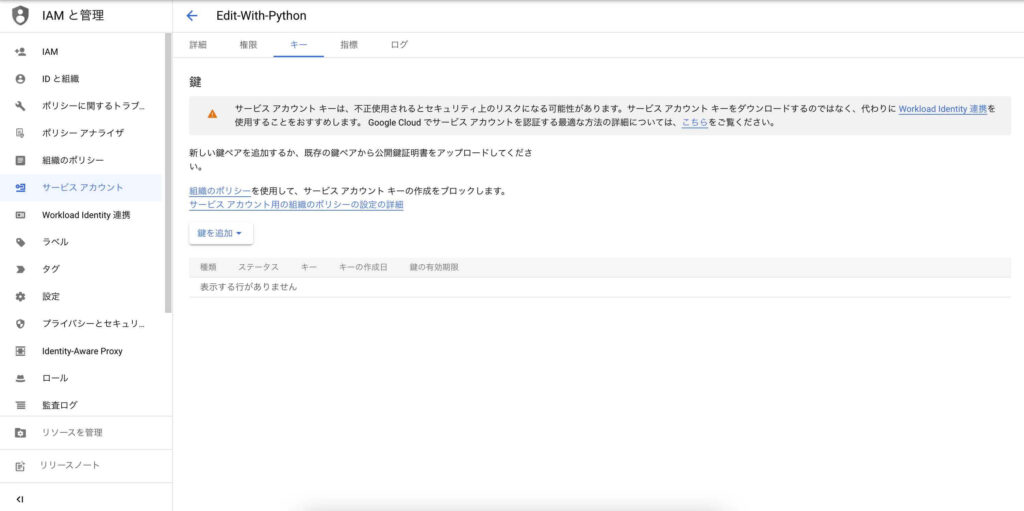
そして、作成したサービスアカウントを確認して、キーの出力を行います・・・
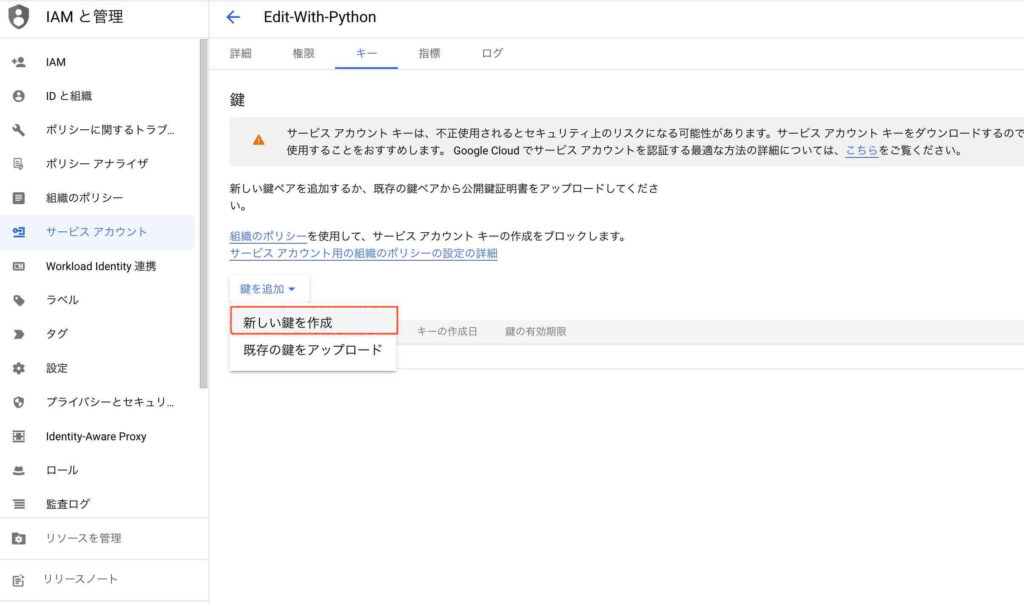
「鍵を追加」→「新しい鍵を作成」の順番でクリックします。
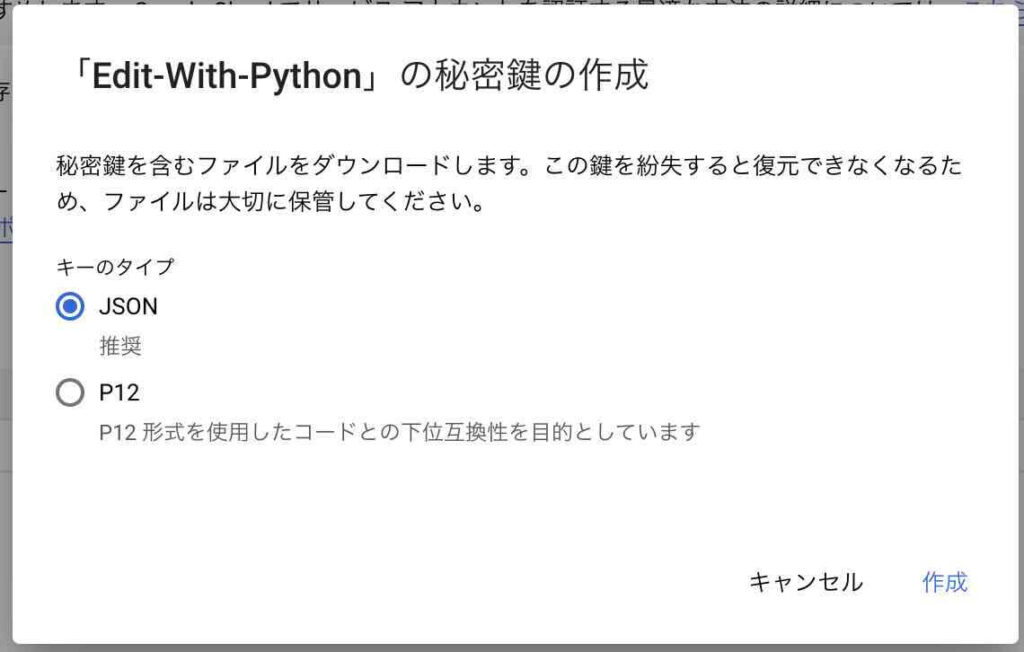
秘密鍵をJSONファイルとして作成します。「作成」をクリックする。
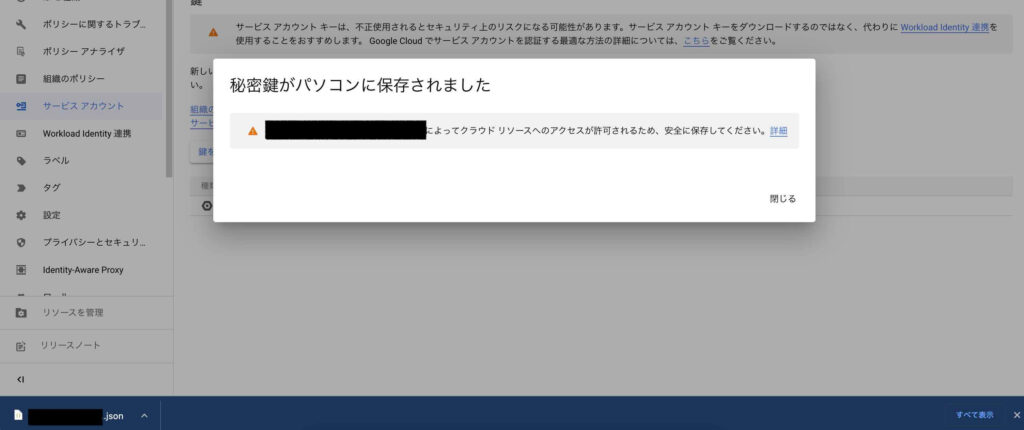
PCにJSONファイル形式のファイルが保存されます。
余談:Workload Identity 連携について
ちなみに、先程のサービスアカウントのキー出力の画面内の警告文に「代わりにWorkload Identity 連携を使用することをおすすめします。」と書いてありました。
こちらの連携設定を行った記事は、こちらになっていますので、興味があればご参考ください。
今回の作業では必要ありません。

設定作業その3:Googleスプレッドシートを編集するための設定
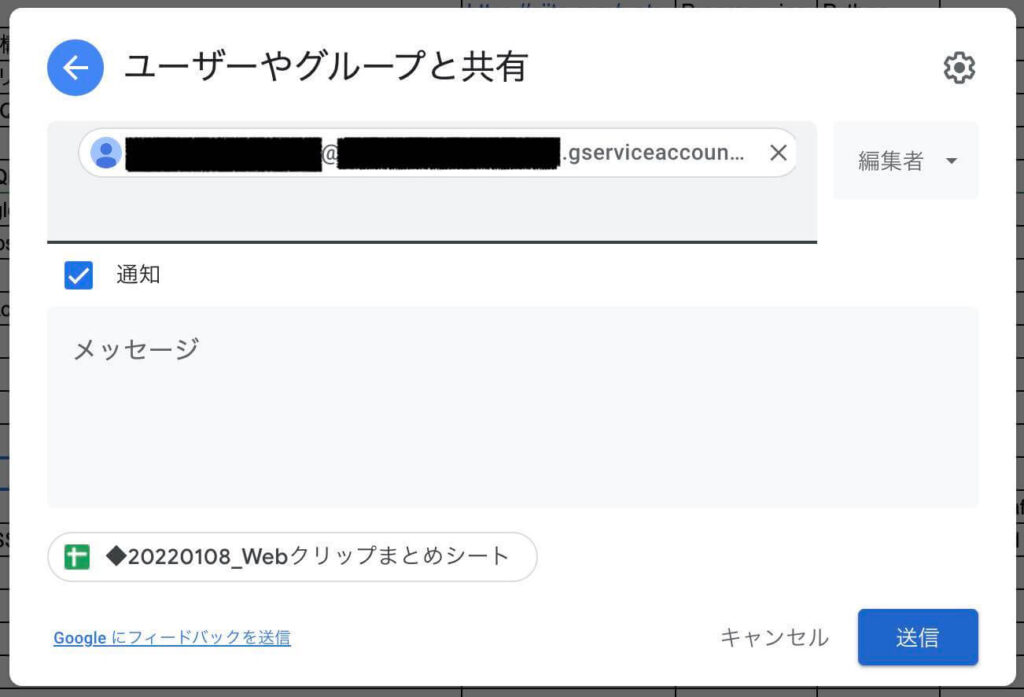
権限追加するシートの右上の「共有」ボタンをクリックする。
IAM設定で追加したサービスアカウントのプリンシパルをコピペします。
そして、そのユーザーを編集者権限にして、送信をクリックします。
確認作業:Pythonコードを実行してみる
設定作業を行った後は、こちらを試してみると動作確認できるかと思います。
import gspread
from oauth2client.service_account import ServiceAccountCredentials

def authorizeGSSToGetWorksheet(credentialJsonFileName : str, gssId : str, sheetName : str):
    scope = ['https://spreadsheets.google.com/feeds','https://www.googleapis.com/auth/drive']
    credentials = ServiceAccountCredentials.from_json_keyfile_name(credentialJsonFileName, scope)
    gc = gspread.authorize(credentials)
    worksheet = gc.open_by_key(gssId).worksheet(sheetName)
    return worksheet

jsonKeyFileName = "先ほどダウンロードしたjsonファイルのフルパス"
gssId           = "共有設定したスプレッドシートのID"
sheetName       = "共有設定したスプレッドシート内の編集したいシート名"

worksheet = authorizeGSSToGetWorksheet(jsonKeyFileName, gssId, sheetName)
cellList = worksheet.findall("検索値")
print(cellList)
gssIdは、URLで言うと、”https://docs.google.com/spreadsheets/d/<この部分>/edit#gid=0″の部分になります。
上述のプログラムを実行してみると、こんな感じの値が返ってくると思うので、スプレッドシートにアクセスできることが確認できると思います。
[<Cell R350C4 'https://qiita.com/ny7760/items/9cdc3407dfda99c21ae1'>]おしまい
ふい〜、何とか設定できたなあ〜
Pythoから叩けるようになることで、スプレッドシートのデータをnumpyとmatplotlibと組み合わせられるようになります。
良ければ、試してみてください。
よいぞ〜、よいぞ〜
以上になります!


コメント